How to Organize Receipts: From Shoeboxes to Full Automation
Lost receipts cost small businesses thousands in missed deductions. Learn 4 ways to organize receipts — from paper folders to AI automation that delivers a tax-ready Google Sheet. Start free.
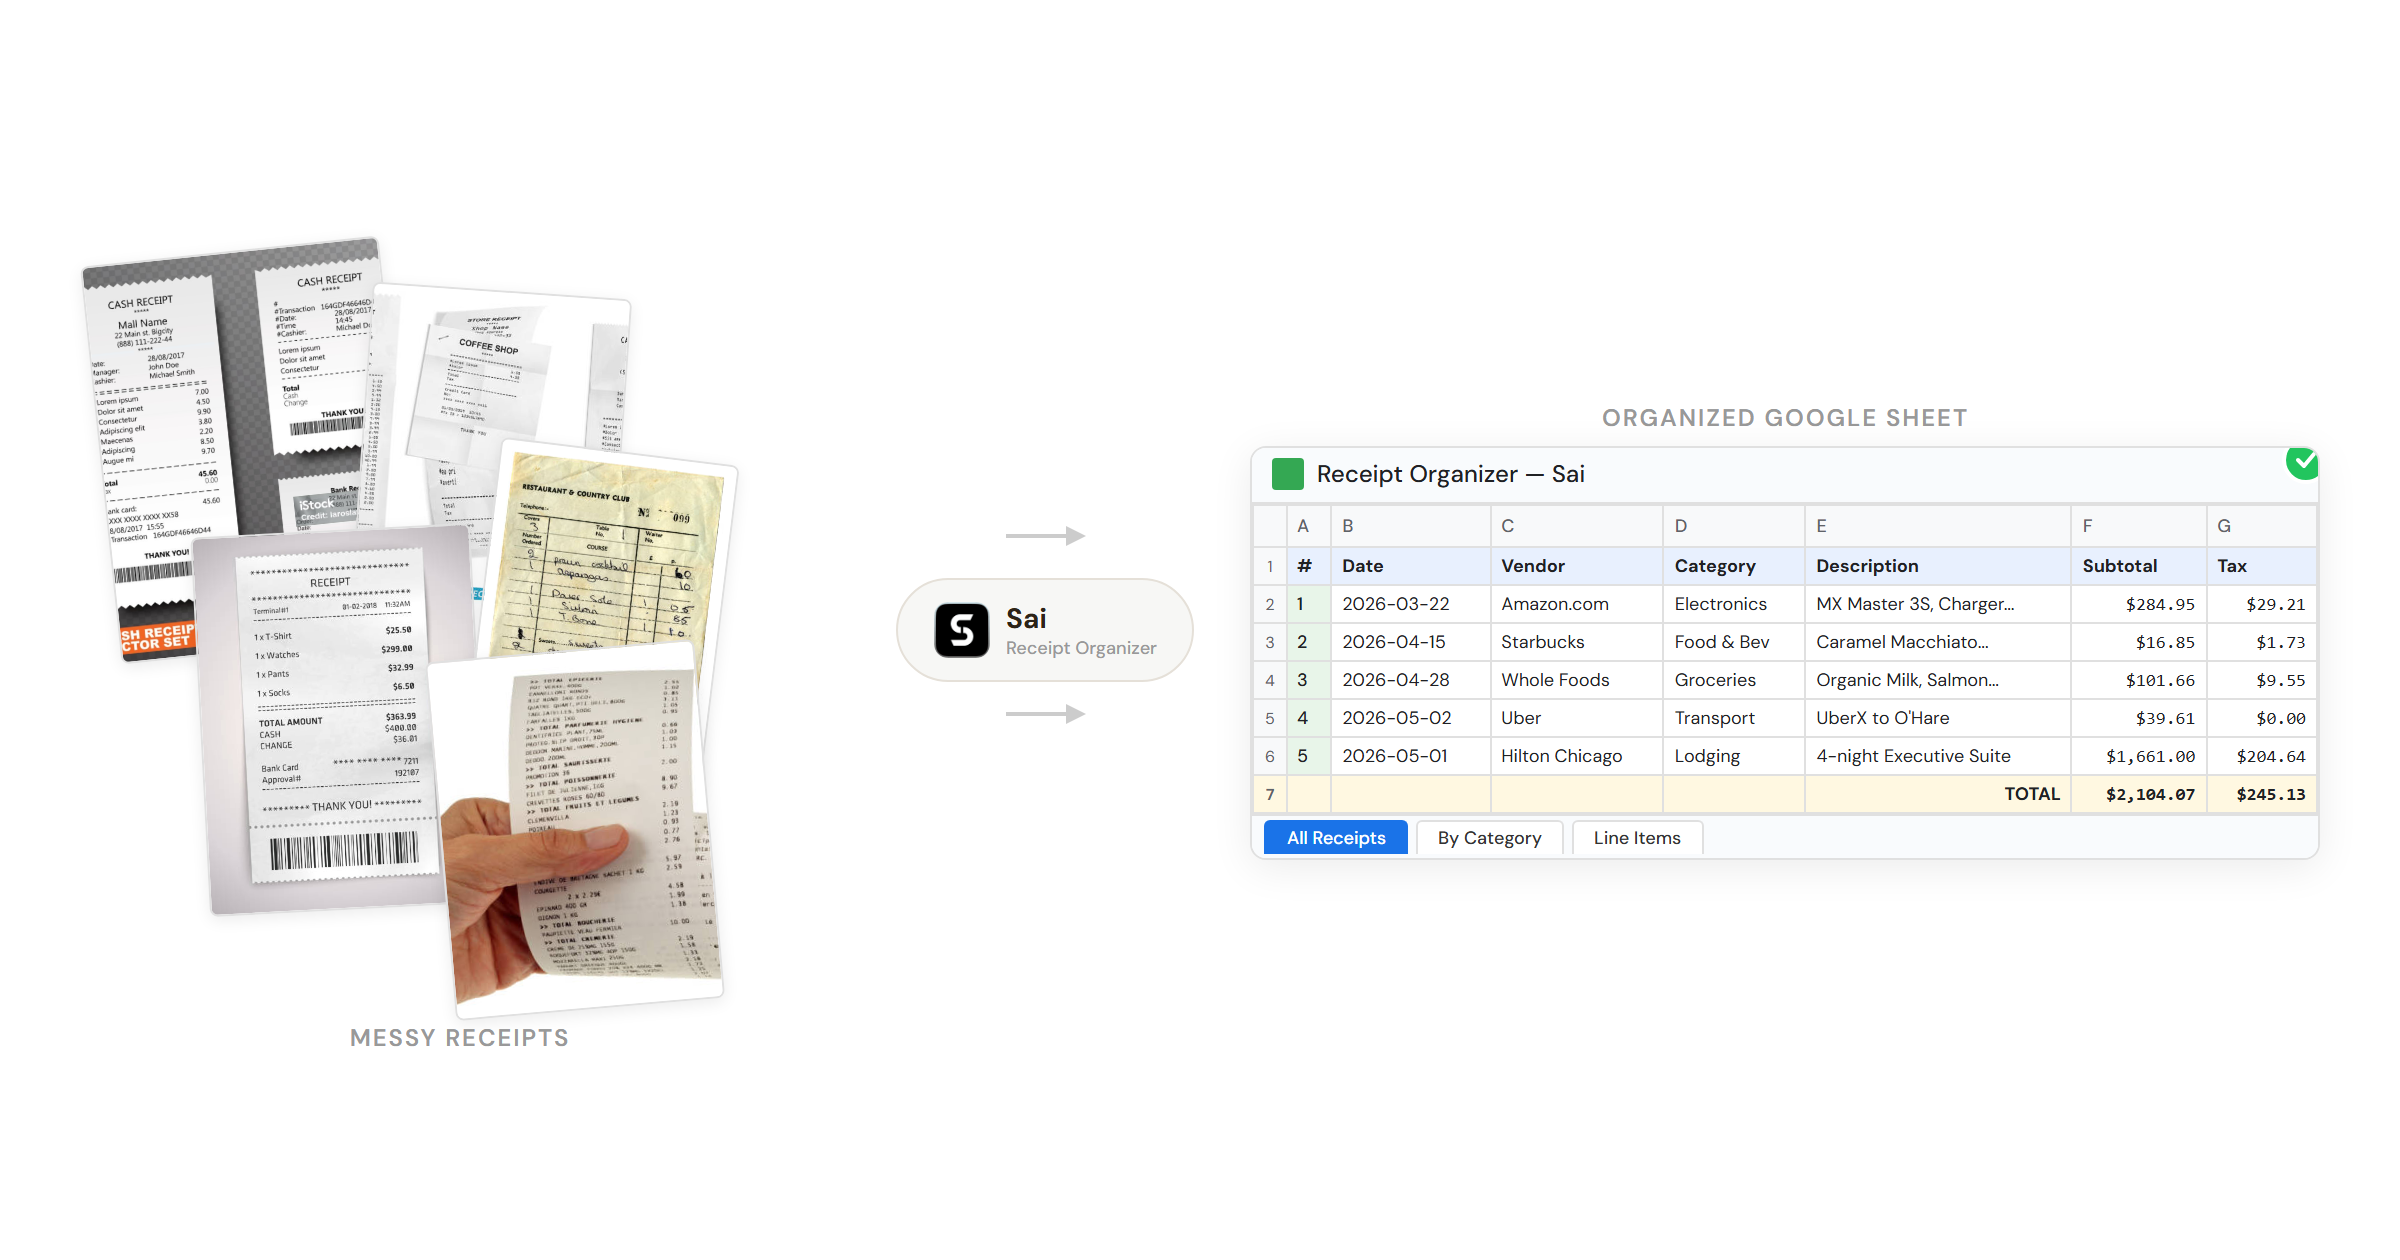
Upload your receipt photos, PDFs, or forwarded emails to Sai.
Tell Sai how you want them organized — by category, by month, by project, or all of the above.
Sai processes, categorizes, and delivers a finished Google Sheet with tax-ready totals and flagged items for review.
Why Receipt Organization Actually Matters
Every freelancer, small business owner, and side hustler knows the feeling: a drawer full of crumpled receipts, a wallet stuffed with faded thermal paper, and the creeping dread of tax season. You know you should organize them. You know you are leaving deductions on the table. But between running the business and actually doing the work, receipt organization falls to the bottom of the list.
Here is the problem: the IRS requires you to keep receipts for at least three years after filing— and up to six years if you underreport income by more than 25%. That is a lot of paper. And thermal paper fades within months, which means the receipt you shoved in your desk drawer in January might be blank by the time you need it in April.
This guide walks through every method of organizing receipts — from basic manual systems to apps that scan and sort, all the way to AI agents that do the entire workflow for you. Pick the method that fits your volume and patience level.
Before jumping into methods, here is what disorganized receipts actually cost you:
Missed tax deductions. The average small business owner misses $5,000-$10,000 in deductible expenses each year, according to the National Association of Tax Professionals. Lost receipts are the number one reason.
Audit risk. If the IRS audits you and you cannot produce receipts for expenses over $75, those deductions get disallowed. You owe back taxes plus penalties.
Time drain. Sorting a year of receipts the week before tax filing takes 8-15 hours for a typical freelancer. The same work takes 10 minutes per week if you stay on top of it — or zero minutes if you automate it.
Cash flow blindness. Without organized expense tracking, you do not actually know where your money goes. You cannot optimize spending you cannot see.
Method 1: The Manual System (Paper + Folders)
This is the baseline — no technology required. It works if you have fewer than 20 receipts per month.
Step 1: Set up physical categories. Get an accordion folder or a set of manila envelopes. Label them by expense category:
Meals and entertainment
Travel and transportation
Office supplies
Software and subscriptions
Professional services
Equipment
Vehicle and fuel
Other / uncategorized
Step 2: Process receipts weekly. Pick one day per week (Sunday evening works well). Empty your wallet, pockets, car console, and bag. Sort each receipt into its category folder.
Step 3: Log key details. For each receipt, write on the back (before the ink fades):
Date of purchase
Vendor name
Business purpose ("Client lunch with Sarah, discussed Q3 project")
Amount
The IRS specifically requires a business purpose for meals and entertainment deductions. Write it while you remember.
Step 4: Monthly reconciliation. At the end of each month, total each category. Enter the totals into a spreadsheet. This creates your running expense report.
Pros: No cost, no learning curve, works offline. Cons: Time-consuming. Receipts still fade. Easy to procrastinate. No backup if the folder is lost.
Method 2: The Spreadsheet System (Google Sheets or Excel)
If you want a digital record without paying for software, a spreadsheet is the upgrade from paper folders.
Step 2: Take a photo of every receipt. Use your phone camera. Name the photo with the date and vendor. Store in Google Drive or iCloud in a "Receipts" folder organized by month.
Step 3: Enter data as you go. Every time you take a photo, add a row to the spreadsheet. This takes about 30 seconds per receipt — but it adds up. At 5 receipts per day, that is 2.5 minutes daily or roughly 15 hours per year.
Step 4: Add summary tabs. Create a second sheet tab with a pivot table or SUMIF formulas to auto-calculate:
Total spend by category
Monthly spend trends
Tax-deductible total vs. non-deductible
If you already use Google Sheets for invoicing, this pairs well with your existing workflow — see our guide on how to build a Google Sheets invoice template for the other side of the equation.
Pros: Free. Flexible. Searchable. Creates a digital backup. Cons: Manual data entry is tedious. Easy to fall behind. Photos and spreadsheet are separate systems.
Method 3: Receipt Scanner Apps
This is where most guides stop. Download an app, scan your receipts, done. Here are the most popular options and what they actually do:
Expensify — The most recognized name in expense tracking. Snap a photo, and Expensify uses OCR to extract vendor, date, and amount. It auto-categorizes expenses and generates expense reports. Best for employees submitting reports for reimbursement. Pricing starts free for individuals, $5/user/month for teams.
Shoeboxed — Unique among receipt apps because they offer a physical mail-in service: you stuff receipts into a prepaid envelope, mail it to Shoeboxed, and they scan and categorize everything for you. Also has a mobile app for digital scanning. Forbes named it the #1 receipt tracking app. Pricing starts at $18/month.
Dext (formerly Receipt Bank) — Built for bookkeepers and accountants. Claims 99.9% OCR accuracy. Integrates directly with QuickBooks, Xero, and Sage. Best for businesses that work closely with an external accountant. Pricing starts at $24/month.
Neat — One of the longest-running receipt management tools (20+ years in business, 2M+ users). Focuses on small business owners who want a simple system. Offers receipt scanning, expense categorization, and tax-ready reports. About $200/year.
Smart Receipts — Open-source, privacy-focused receipt scanner with 500,000+ users worldwide. Generates PDF and CSV expense reports. Free with a premium tier for advanced features.
Wave — Free accounting software that includes receipt scanning. Best for freelancers and sole proprietors who need invoicing and receipt tracking in one place without paying for QuickBooks.
What these apps do well: They eliminate manual data entry for individual receipts. You scan, they extract, you verify.
What they do not do: They do not process a backlog of 200 receipt photos you took over the past six months. They do not automatically create a structured Google Sheet with running totals and tax categories. They do not cross-reference your receipts against your bank statements. And they do not generate the tax-ready summary your accountant actually needs.
In other words, receipt scanner apps solve the scanning problem. They do not solve the organizing problem.
Method 4: AI-Powered Full Automation with Sai
This is the method that did not exist two years ago.
Instead of scanning one receipt at a time and manually verifying each one, an AI agent processes your entire receipt backlog in bulk— photos, PDFs, forwarded email receipts, whatever you have — and delivers a finished, categorized Google Sheet with running totals, tax deduction flags, and a "flagged for review" tab for anything ambiguous.
Dump all your receipt photos, PDFs, and screenshots into a folder and upload them to Sai. No sorting required. No naming convention. Just upload the pile.
Step 2: Tell Sai what you need.
A single instruction like: "Organize these receipts into a Google Sheet. Categorize by expense type, flag tax-deductible items, and calculate monthly totals."
Step 3: Sai processes every receipt automatically.
Reads each image and PDF using OCR
Extracts vendor name, date, amount, tax, and payment method
Detects possible duplicates (same vendor + same amount within 3 days)
Flags ambiguous items for your review
Step 4: Get a finished Google Sheet with 5 tabs.
Tab 1 — All Receipts: Every receipt in one chronological list with all extracted fields.
Tab 2 — Summary by Category: Total spend per category with percentage breakdown.
Tab 3 — Monthly Summary: Month-by-month spending with top category highlights.
Tab 4 — Tax Deductions: Only the tax-deductible expenses, grouped by deduction type, with subtotals your accountant can use directly.
Tab 5 — Flagged Items: Receipts that need your attention — unclear vendor names, possible duplicates, ambiguous categories.
The difference is the output. Receipt scanner apps give you a list of scanned receipts. Sai gives you the finished deliverable — the organized, categorized, totaled spreadsheet that you (or your accountant) actually use.
How this connects to your invoicing workflow: If you use Sai to automate your invoicing, your income and expenses live in the same ecosystem. Sai can cross-reference receipt categories against invoice line items to show you true profit margins per project — something no receipt scanner app does on its own.
Choosing the Right Method for Your Situation
Not every method fits every person. Here is a decision framework:
Method
Best For
Monthly Volume
Cost
Time per Week
Tax-Ready Output
Paper + Folders
Individuals with minimal expenses
Under 20
$0
20-30 min
No
Spreadsheet + Photos
Freelancers who want a digital record
20-50
$0
30-60 min
With formulas
Receipt Scanner App
Small businesses wanting OCR automation
50-200
$5-30/mo
15-30 min
Partial
AI Agent (Sai)
Anyone who wants zero manual work
Any volume
Free tier available
0 min
Yes — full Google Sheet
Receipt Organization Best Practices (Any Method)
Regardless of which method you choose, these practices will save you headaches:
1. Process receipts within 48 hours. The longer you wait, the less likely you are to remember the business purpose — and the more likely thermal paper receipts will fade.
2. Photograph before filing. Even if you keep paper copies, always take a phone photo as backup. The IRS accepts digital copies per Revenue Procedure 98-25.
3. Annotate the business purpose immediately. "Lunch" is not enough. Write "Lunch with [client name], discussed [project/topic]." This is what survives an audit.
4. Separate personal and business expenses. Use a dedicated business credit card if possible. Commingling makes categorization twice as hard and raises red flags during audits.
5. Reconcile monthly, not annually. Catching a missing receipt 2 weeks after the purchase is easy. Catching it 11 months later is nearly impossible.
6. Back up everything. Cloud storage (Google Drive, iCloud, Dropbox) for digital copies. If your only copy of a receipt is a fading piece of thermal paper in a folder, it is not backed up.
7. Track the $75 threshold. The IRS generally does not require receipts for business expenses under $75 (except lodging). But keeping them anyway is good practice — especially since totals add up.
Stop doing repetitive tasks. Let Sai handle them for you.
Sai is your AI computer use agent — it operates your apps, automates your workflows, and gets work done while you focus on what matters.


.svg)
.svg)